OTA - Over The Air SKETCH upload
Youll find here the instructions needed to enable this feature on your Fishino boards.
- If you still have an old FishinoFlashed application you need to update it. We suggest you look often for updates on this site.
- Prepare your board for firmware upgrade, as explained in "Firmware upgrade" section on this site.
- Run FishinoFlasher application, which will appear as in the picture to the right.
- Select a recent firmware version; the latter is the best one, of course!
- Select che checkbox marked "Allow sketch upload via WiFi". If this checkbox is NOT there, you've got an old FishinoFlasher and/or you selected an old firmware version.
- Insert a name for your board, for example "MyFishino"
- Insert a port number; if you haven't a good reason to change it just leave the proposed 7777.
- Start firmware upgrade.
- For 8 bit boards, remove the firmware upgrade connections and follow instructions on next step below


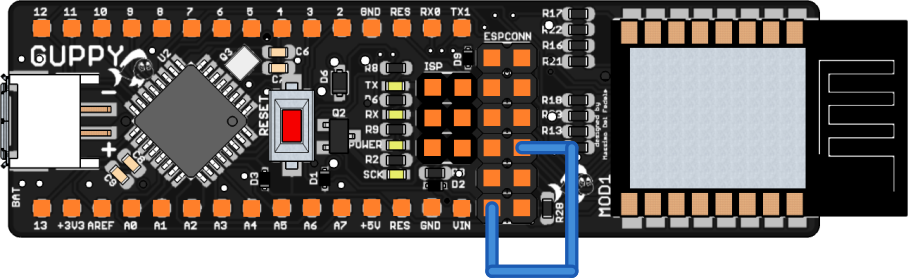

Sulla Fishino32 non è necessario eseguire alcuna connessione; l'hardware è già previsto per l'upload via WiFi.
This will allow the WIFi module to reset the Atmega controller and put him in ISP (In-circuit Serial Programming) mode.
Beware, without this connection you'll get a weird error from IDE when you'll try to upload a sketch via OTA.
The pictures on left side shows you how to make the connection for each Fishino model.
OTA sketch upload
Once completed all the steps above, now you MUST upload (via USB!) a sketch that makes a WiFi connection to your Access Point, so the module can store your access credentials and use them automatically at boot.
NOTE : the connection parameters used will be THE LATEST used by your sketches; if you change them and/or you'll use your Fishino in AP mode, this mode will be used on next boot by OTA too.
Once done, run the IDE and go in port selection menu; you'll see, as in image below, one (or more) network ports, with the name(s) of your boards as programmed during flash upgrade: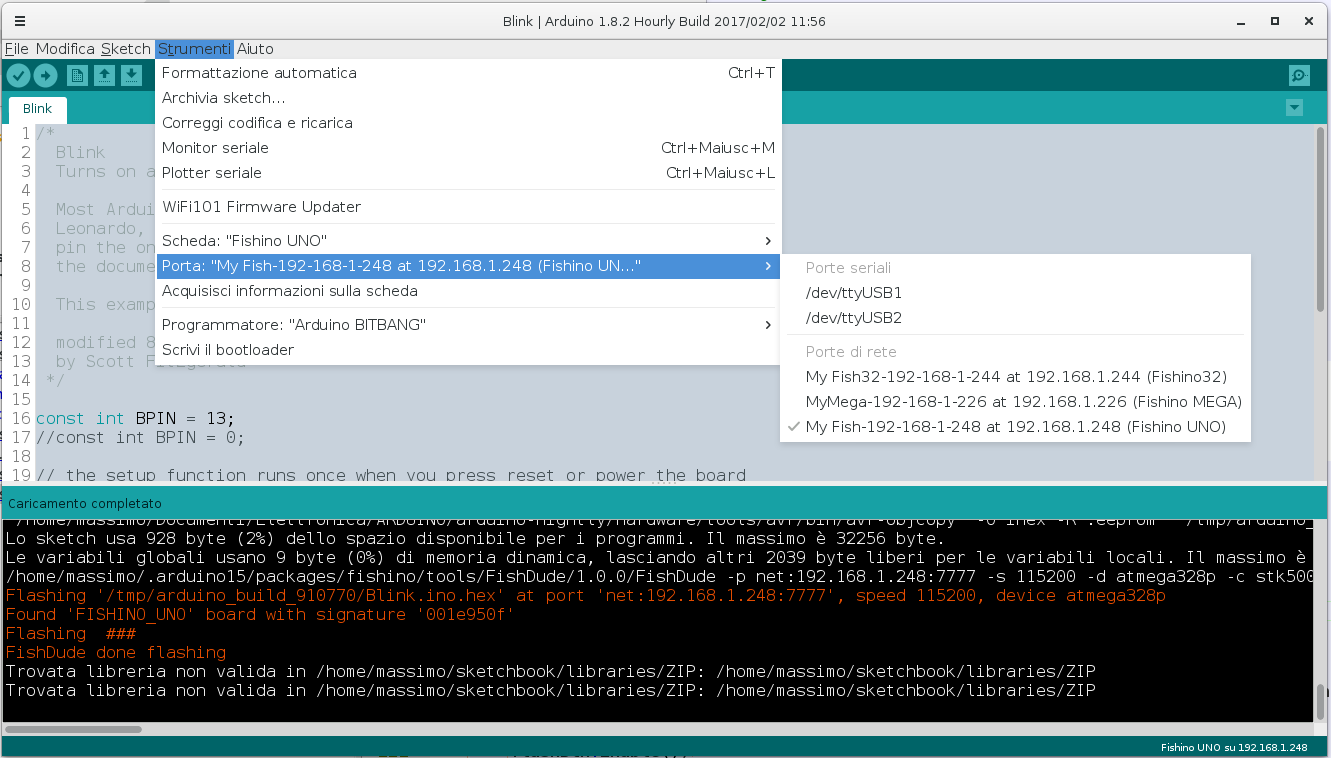
From now, to upload your sketches it's enough to select the correct port and proceed as usual.
Troubleshooting
If something goes wrong, before asking for support please check following points:
- Check that your flasher and/or the firmware are not too old
- Be sure to have used at least once your WiFi connection with your board
- Try to close and restart the IDE
- Try to disconnect your Fishino and re-power it
- Double check the connection between GPIO5 e l' ATM-RES as explained above
- Try again
- If still not working, try to power off and on the board